Overview
This guide walks you through integrating Chatwoot with Pathors. Once set up, Pathors AI will automatically respond to conversations in your Chatwoot inbox via an Agent Bot.Prerequisites
- A Chatwoot account (self-hosted or cloud)
- A Pathors project
Step 1: Get Your Chatwoot Credentials
You will need three pieces of information from your Chatwoot instance:Base URL
This is the URL of your Chatwoot instance.- Chatwoot Cloud:
https://app.chatwoot.com - Self-hosted: Your custom domain, e.g.,
https://chatwoot.yourcompany.com
Account ID
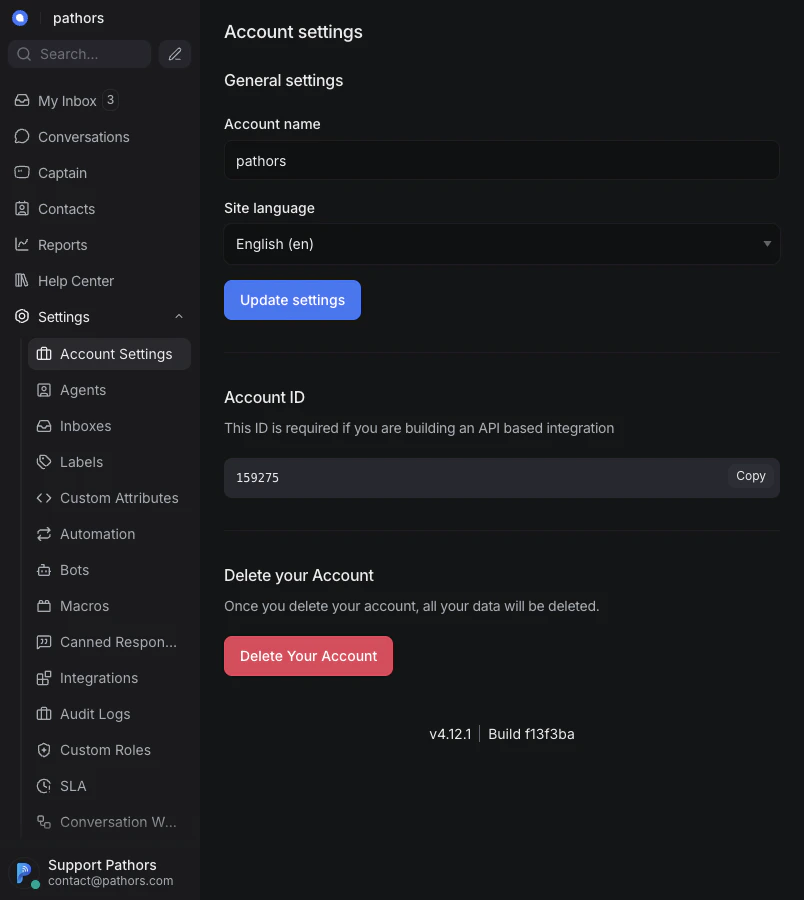
- Log in to your Chatwoot dashboard
- Go to Settings > Account Settings
- Your Account ID is displayed on this page — click Copy to copy it
API Access Token
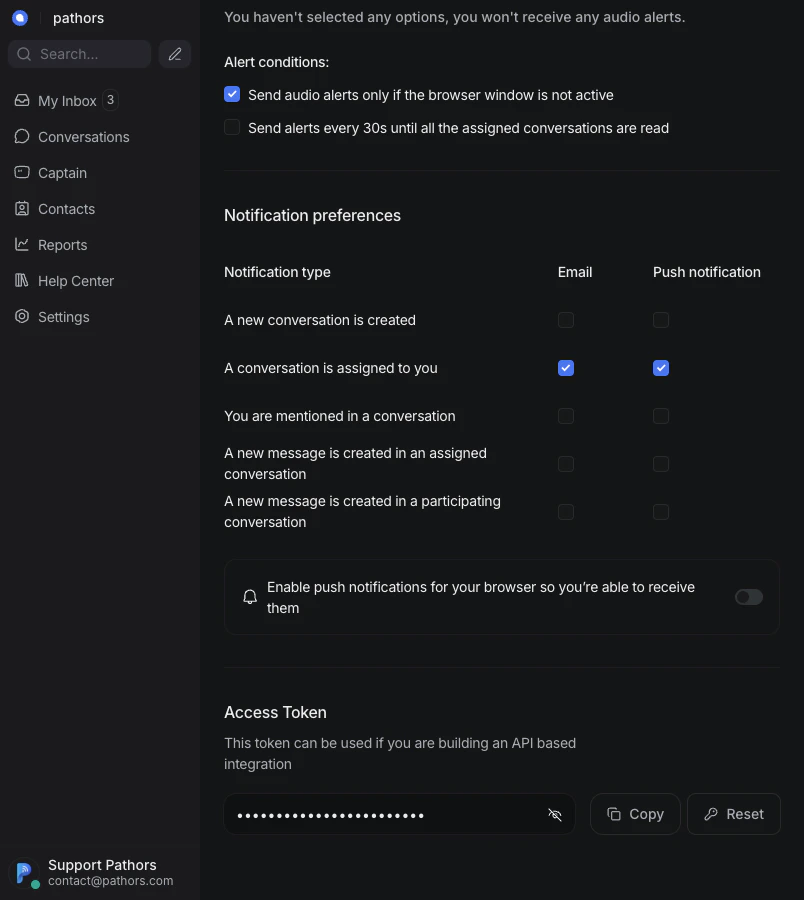
The API Access Token is required for Pathors to communicate with the Chatwoot API on your behalf.- Log in to your Chatwoot dashboard
- Click your avatar (bottom-left corner) to open your profile
- Scroll down to the Access Token section
- Click the eye icon to reveal the token, then click Copy
Step 2: Configure Chatwoot in Pathors
- Log in to your Pathors project
- Go to Integrations and click Chatwoot
- Toggle the integration on using the switch in the top-right corner

- Fill in the credentials (your changes auto-save after a short delay):
- Account ID: Your Chatwoot Account ID from Step 1
- API Access Token: The token from Step 1
- Base URL: Your Chatwoot instance URL (defaults to
https://app.chatwoot.com)
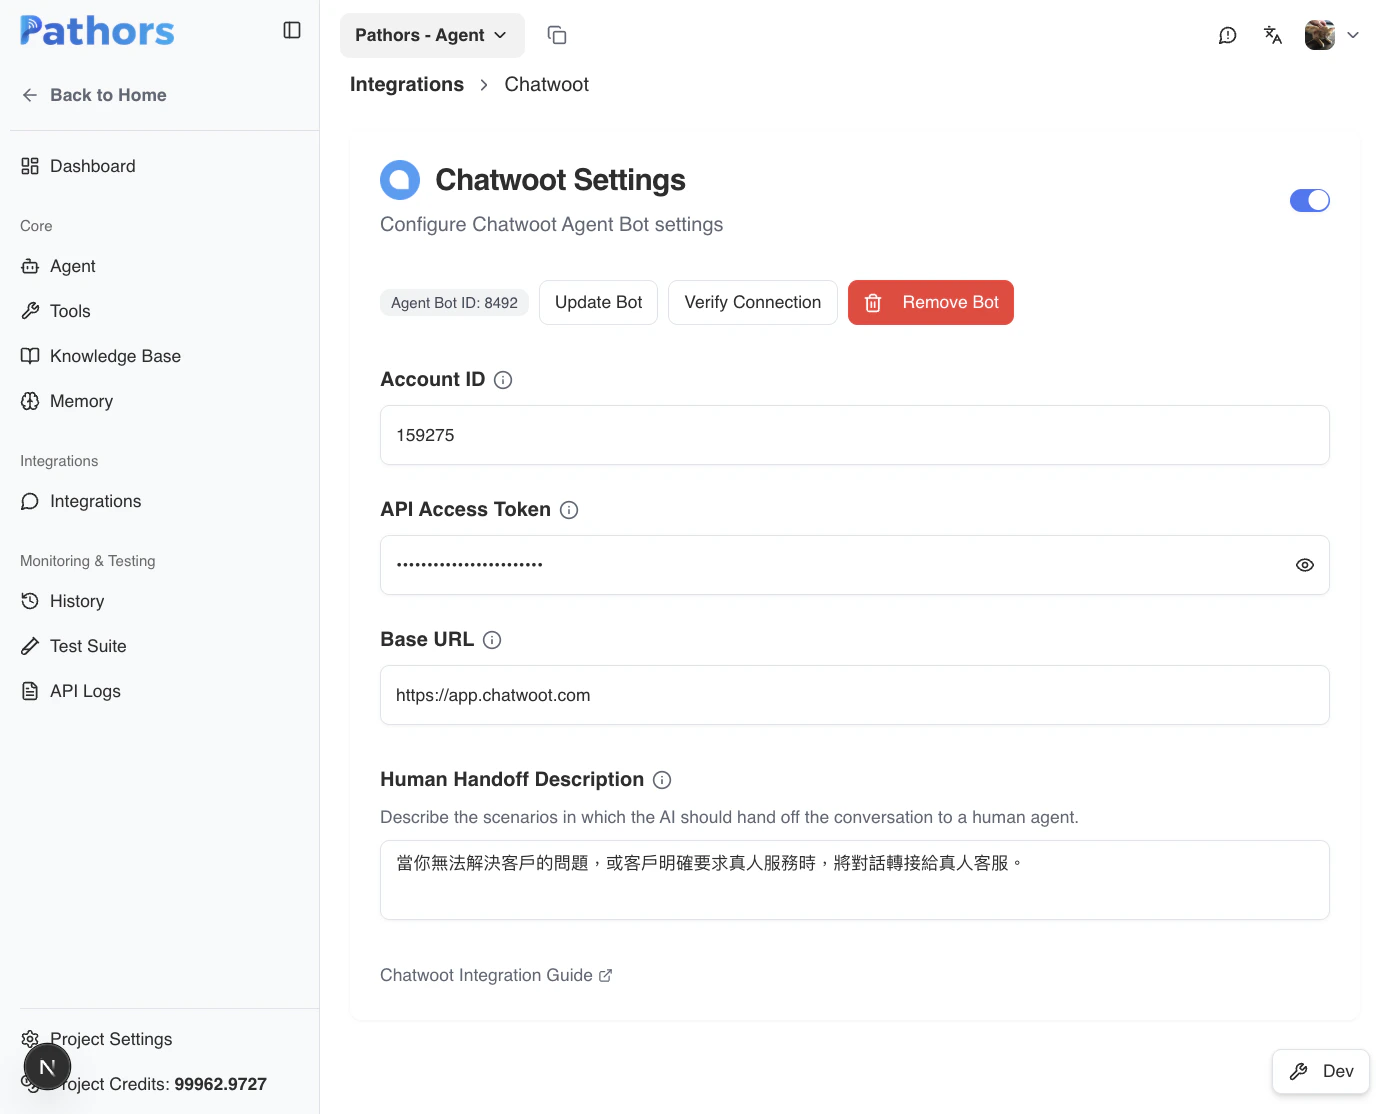
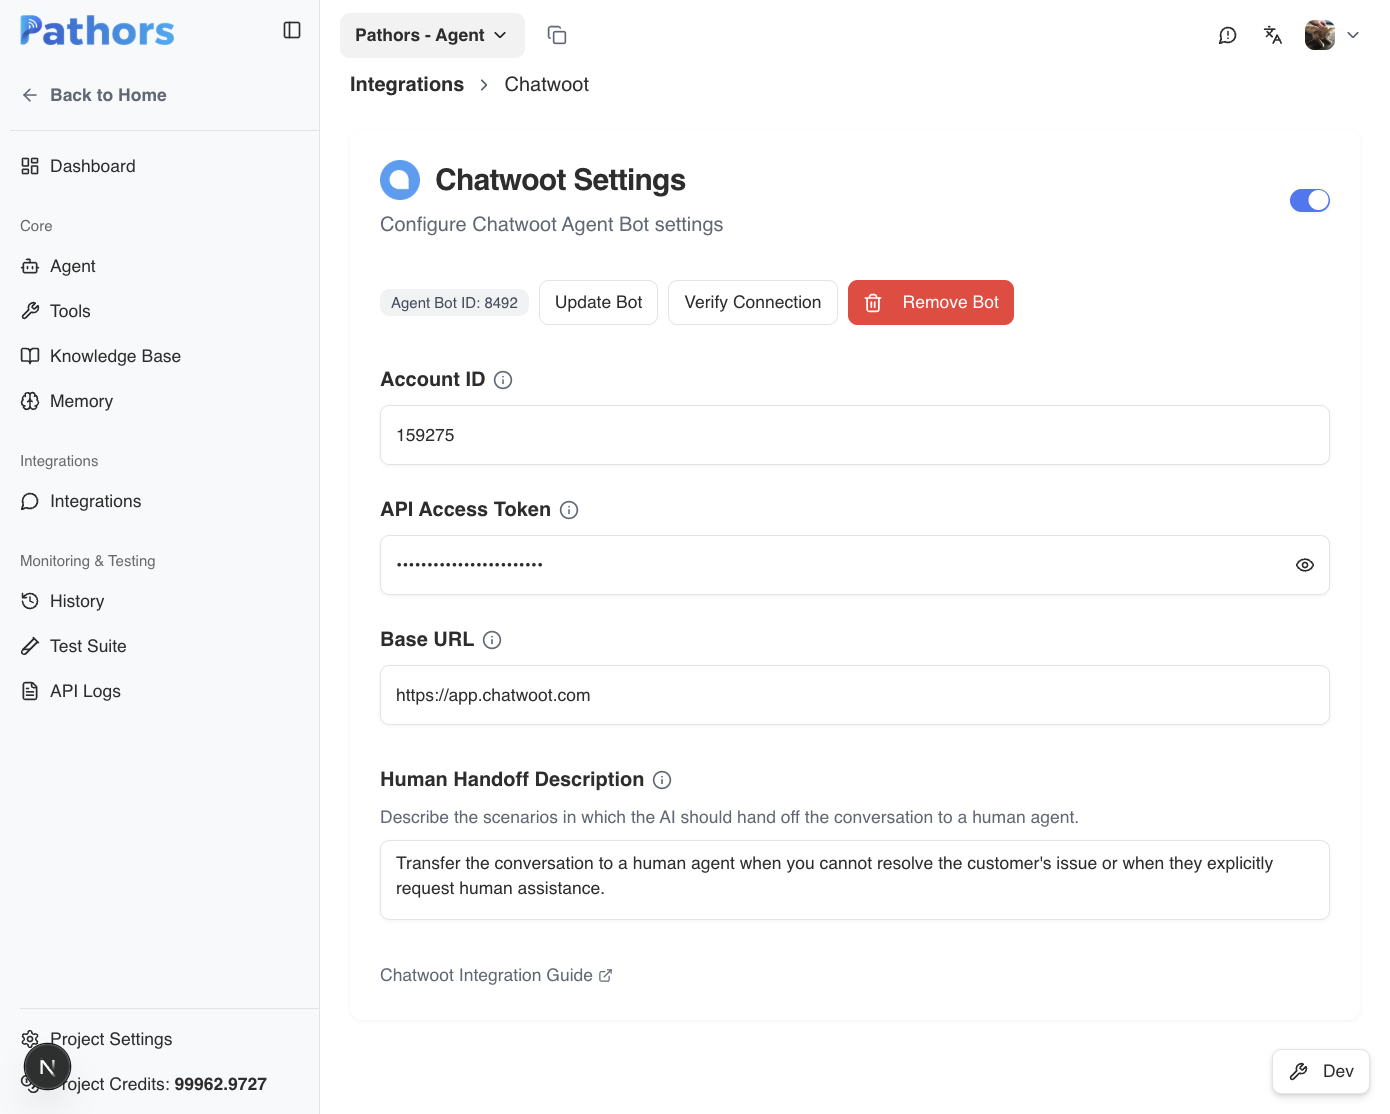
Step 3: Customize the Handoff Behavior (Optional)
Pathors ships with atransfer_to_human tool that lets the AI hand the conversation to a live agent. You can tailor when it fires by editing the Handoff Description field.
Step 4: Create the Agent Bot
After your credentials are saved:- Click the Create Bot button at the top of the Chatwoot settings card
- Pathors will automatically create an Agent Bot in your Chatwoot account
- The bot name matches your Pathors project name
- The webhook URL is configured automatically
- Once created, a badge will display the Agent Bot ID
Step 5: Assign the Bot to an Inbox
The Agent Bot needs to be assigned to a Chatwoot inbox to start receiving conversations.- In your Chatwoot dashboard, go to Settings > Inboxes
- Select the inbox you want the bot to handle
- Click the Bot Configuration tab
- Under Select an agent bot, pick the bot that was just created (it will have your Pathors project name)
- Click Update

Each inbox can only have one Agent Bot assigned at a time. If you have
multiple inboxes, you can assign the same bot to each one.
Step 6: Verify the Connection
- Back in the Pathors Chatwoot settings page, click Verify Connection
- If the verification succeeds, the integration is fully configured
- Try sending a message to the inbox from a contact to confirm the bot responds
Troubleshooting
”Invalid API Access Token” error
- Ensure you copied the full token from your Chatwoot profile
- Verify that the token belongs to an account with API access
- Check that the Account ID matches the account the token belongs to
”Agent bot with this name already exists” error
- Another bot with the same name already exists in your Chatwoot account
- Remove the duplicate from Settings > Bots in Chatwoot, or rename your Pathors project
Bot is not responding to messages
- Verify the bot is assigned to the correct inbox (Step 5)
- Click Verify Connection to ensure the bot is still properly configured
- Check that the Pathors integration is toggled on
”Agent bot not found” error during verification
- The bot may have been deleted from the Chatwoot side
- Click Create Bot to create a new one, then re-assign it to your inbox